Universal abilities
[Double] Rush: Add 1 to the Move characteristic of this fighter until the end of their activation.
One of the most often used abilities in first round of the game. You should always keep this ability in mind when your movement isn’t enough to get you where you need to be with your key fighters. With 3″ move fighters dominating the meta every movement ability is a powerful tool and Rush is a tool available to everyone. Worth noting that basically all other movement abilities are better, so make sure that your faction doesn’t have access to other movement abilities until you decide to Rush. This ability is especially important in Rumble Pack battleplans as few of them require traversing a little over 6″ to get to some objectives, like in the Power Struggle (picture below), where reaching top or bottom objective require moving minimum 7″ (assuming perfect positioning and no terrain in the way), so slower warbands require Rush or similar abilities to prevent opponent from gaining early lead.

Extreme example of this is Rumble Packs’s Supremacy were both middle objectives require 6,04″ of movement to reach them. Seize and Control is similar with 2 further objectives requiring at least 7,92″ travel of your fighters.
[Double] Onslaught: Add 1 to the Attacks characteristic of melee attack actions made by this fighter until the end of their activation.
Similarly to Rush you should always remember about this ability when making decisions around attack actions. Just as with previously described ability most other abilities that boost your attack actions will bring you more value but unlike Rush there are some similar abilities that are worse than Onslaught (mostly single action bonuses or abilities improving Strength rather than number of attacks, but the comparison with Onslaught depend on profiles of both attacker and its target). Sometimes overlooked change from 1st edition of Warcry is that Onslaught can no longer boost ranged attacks. The best fighters for this ability have profiles with high Strength and high damage like most of Askurgan Trueblades or Ogor Breacher from Iron Golems.

When considering this ability remember that bonus action abilities that will let you use additional attack action are almost always more efficient (bonus move from ability like Ironjawz Charge! double that let you do two attack actions will be better idea than using “move” and “attack” actions with double spent on Onslaught)
[Triple] Respite: A fighter cannot use this ability if they are within 1″ of any enemy fighters. Remove a number of damage points allocated to this fighter equal to the value of this ability.
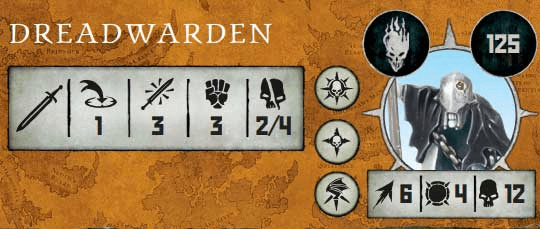
It’s good to remember about this ability in certain kill missions and in case your Warband depends on triples that you want to use near the end of the turn (like for example resurrection abilities) so in case they are not needed you have a backup plan on what to do with your ability dice (Dreadwarden from the picture below is extremely squishy and will gladly regain some health when there is nothing to resurrect).
Respite is also an option to lower the chance of dying to enemy Counter reaction (description in Universal Reactions below) for your low health models.Due to 1″ away from enemies restriction it will be more helpful to fighters with 2″-3″ attack range.
[Triple] Inspiring Presence: Pick a visible friendly fighter within 6″ of this fighter that has not activated yet this battle round. You can activate that fighter immediately after this fighter’s activation ends.
Inspiring Presence is only available to fighters with “Hero” runemark. Value of this ability depends heavily on type of victory condition in battleplan. Its rarely helpful in objective missions, situational in kill missions and very good in treasure missions. Chaining activations let you “focus fire” on certain enemy before he can escape, which why you may want to use it in kill missions. For similar reasons this ability is great with treasure missions to not let your opponent steal just dropped treasure after your killed enemy treasure carrier in the second action of your hero. Inspiring Presence is even more powerful when you are holding the treasure as it lets your heavily wounded hero use action to drop the treasure and then Inspiring Presence other fighter that will pick it up and move to safer location. Potential of such play is the reason why heroes usually fill “treasure carrier” role better than regular fighters (keep this in mind during listbuilding).
[Quad] Rampage: This fighter can make a bonus move action. Then, they can make a bonus attack action.
Ability with the highest “game winning” potential across all Universal Abilities. Possibility of rolling quad or improving your triple to quad and in consequence using Rampage is influencing listbuilding of a lot of the players as Rampage in early turns can heavily swing the game in your favor. To take advantage of this make sure that you are running a fighter that could maximize results of extra actions from this ability. As example of Rampage power I will bring back the first activation of the final game from “Gnarlwood Into The Unknown” tournament (More on the tournament here). I won initiative and had access to Rampage and Gutlord that could reach enemy forces. I managed to kill Bullgor with Great Axe (30 Wounds with T4) before my opponent first activation.

Some of the strength of this ability lies in the fact that it completely changes the threat range of every fighter. Just mentioned Gutlord has usual threat range of 9″ (4″ of regular move, 3″ of extra move from the “On the Mawpath” double and 2″ range of his weapon) so positioning just over 9″ of him seams like a great idea. Rampage changes this values drastically as Gutlord can attack fighters 14″ away or attack twice targets within 10″ range.
Universal Reactions
Counter: A fighter can make this reaction after they are targeted by a melee attack action but before the hit rolls are made. For each hit roll from that attack action that misses, allocate 1 damage point to the attacking fighter. For each hit roll of 1, allocate 2 damage points to the attacking fighter instead.
Definitively the most often used reaction in the game. Three most common uses are:
- Trying to prevent double attack action of heavily wounded enemy fighter by trying to kill him with counter on first attack action. Fighters with low Strength and high number of attacks like Necropolis Stalkers with Spirit Blades are your best targets for that.

- Trying to get any value out of dying models. It’s better to use Counter on opponent that has very high chance to kill your fighter than to die and do nothing.
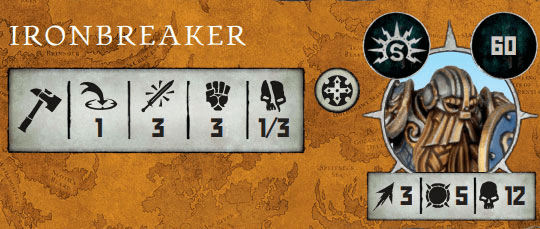
- Using Counter as a main source of damage for fighters with very weak attacks and high Toughness like Ironbreakers
Take Cover: A fighter that is in cover can make this reaction after they are targeted by a missile attack action but before the hit rolls are made. After the hit rolls have been made, roll a dice for each critical hit. On a 4+, that critical hit becomes a hit instead. Fighters with the Mount runemark cannot make this reaction.
As with all other abilities and reactions – defensive tools are designed to be less efficient than offensive tools. Very situational and most often used in dire situations (trying to keep treasure bearer or enemy target in kill mission alive) or to burn actions that you don’t have better use for (fulfilling role of sitting on distant objective). It requires your fighter to already be in cover so keep that in mind if you want to use this reaction.
Strike Them Down: A fighter can make this reaction when a visible enemy fighter within 1″ of them makes a disengage action but before that fighter moves away. Roll a dice. On a 4+, allocate D6 damage points to that enemy fighter.
This reaction works best with durable chaff hordes. Engaging important enemy fighters with durable chaff (ideally after the enemy fighter is already activated) give opponent an option in next round to either attack (and get countered) or disengage and getting hit by Strike them Down. This reaction is a plan B for warbands build around Counter.
Universal Monster Abilities
[Double] Monstrous Reach: Until the end of this monster’s activation, do not count the vertical distance when measuring the range for attack actions made by this monster.
Extremely terrain dependent. The fact that all monsters can use it makes avoiding them very difficult. This is also a neat trick that monsters can use to attack 2″ reach opponents from outside their attack range which may matter when facing powerful Ogre heroes. Most valuable in kill missions and treasure missions to reach key fighters, but in this cases next ability on the list is way more useful.
[Triple] Drag and Maul: Pick a visible enemy fighter within 6″ of this monster. Remove that fighter from the battlefield and set them up within 1″ of this monster. Then, roll a number of dice equal to the value of this ability. For each 4+, allocate 3 damage points to that fighter.
The strongest and most hated ability in the game. Drag and Maul when used by healthy Chimera combined with attack action is a death sentence for 95% fighters in the game. Using it as many times as possible is in most cases the best possible strategy. Attack action is usually following this ability to drop tones of damage on single fighter most likely killing it on the spot.
[Quad] Demolishing Rampage: Pick a terrain feature within 1″ of this monster. In an order of your choice, place each objective, treasure token and fighter that is on that terrain feature, and on any other terrain feature that is on that terrain feature, on the battlefield floor in a location of your choice as close as possible horizontally to its current location. Then, in an order of your choice, each fighter placed on the battlefield in this manner suffers impact damage. Then, remove the terrain feature(s).
Vary rarely used ability. In most cases it is used to destroy terrain that is involved in winning conditions of the mission in play (destroying platform in controlling platforms scenarios). Second use case is demolishing a path for a monster that is surrounded by terrain and can’t move anywhere.
Monster Hunting Abilities
[Double] Binding Ropes: Pick an enemy monster within 1″ of this fighter and roll a number of dice equal to the value of this ability. For each 4+, subtract 1 from the Move characteristic of that monster (to a minimum of 3) until the end of the battle.
Very weak ability as most monsters that are seeing play have very high movement characteristic and slowing them down a little is making very little difference. Monsters that were already bracketed few times aren’t that impactful and spending double on finishing them is usually a better idea.
[Triple] Go for the Eyes: If the next attack action made by this fighter this activation that targets an enemy monster scores any critical hits, subtract 1 from the Attacks characteristic (to a minimum of 1) of attack actions made by that monster until the end of the battle.
Another weak ability as using triple to deal more damage to a monster will help with dealing with the monster way more than a potential for -1 attack. The strongest monsters affected by this ability will still have 4 or 5 attacks which is usually more than enough to kill most fighters from a warband in one attack.
[Quad] Taunt: Pick a visible enemy monster within 6″ of this fighter and roll a number of dice equal to the value of this ability. If a 4+ is rolled on any of the dice, then until the end of the battle round or until this fighter is taken down, attack actions made by that monster must target this fighter.
Out of all of the Monster Hunting abilities this is the only one that actually helps with controlling them. When desperate or just without any other plan of dealing with the monster I suggest to end turn with any fighter within 1″ of the monster so next turn there is potential to Taunt this monster with another mobile fighter and running away from all enemy threats. This way monster will not be able to use move action to close the distance to taunting model and will have to disengage or wait for other fighters to deal with the fighter next to it. Obviously after disengage or death of our “bodyblocker” we engage the monster again with different fighter. This is a desperate plan but sadly there aren’t many good plans of dealing with threats like Chimera.
